

If you’re raising backyard chickens, you already know how important it is to provide cozy, secure spots for your hens to lay their eggs. But buying commercial nesting boxes can get expensive fast. Fortunately, there’s a simple, affordable, and surprisingly stylish solution: milk crate nesting boxes!
Whether you’re a seasoned homesteader or just starting your flock, this DIY project is perfect for saving money, reusing materials, and giving your chickens a comfy place to nest.
What You’ll Need
-
Milk crates (one per 3–4 hens is ideal)
-
Screws or zip ties (for securing the crates)
- Hack saw/small saw (for cutting one side)
-
A drill or utility knife (depending on how you mount them)
-
Straw, pine shavings, or nesting pads (for bedding)
-
Optional: curtain material or burlap for privacy
Why Milk Crates?
Milk crates are sturdy, ventilated, and already shaped perfectly for nesting. They’re stackable, easy to clean, and often free or very cheap at thrift stores or online marketplaces. Plus, they’re lightweight and can be mounted or rearranged as needed.
How to Build Your Nesting Boxes
Step 1: Clean the crates
Give them a good rinse with soap and water, especially if they’ve been used for other purposes. Dry thoroughly to avoid mold or mildew.
Step 2: Decide on placement
Hens prefer quiet, low-traffic spots to lay their eggs. Choose a shaded, sheltered area inside your coop. You can stack the crates or line them up side by side. Just make sure the bottom edge isn’t too high off the ground—about 12–18 inches is perfect.
Step 3: Cut
When cutting, it is best to keep a small lip on the milk crate to help keep the eggs secure and from rolling out. Reference the image below to show the preferred cut line.

Step 4: Secure the crates
Attach them to a wall using screws (drill through the back) or zip ties if you’re connecting them to wire fencing. If you’re stacking them, place bricks or wood between layers for stability, or anchor the stack to the wall to prevent tipping.
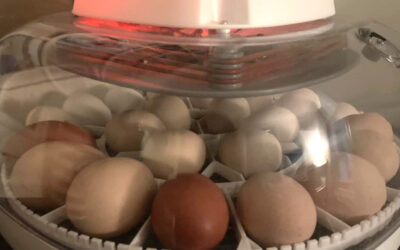
Step 5: Add bedding
Line each crate with soft bedding to cushion the eggs and make the nest inviting. Straw, pine shavings, or nesting pads work great.
Step 6: Optional privacy curtains
Some hens like a little privacy while laying. You can hang a piece of burlap or old cloth across the front to create a cozy, cave-like feel. Just be sure there’s enough airflow and light.
Maintenance Tips
-
Clean regularly to prevent mites and bacteria buildup.
-
Collect eggs daily to keep hens laying in the boxes.
-
Replace bedding when it gets dirty or damp.
-
Watch for broody hens who may hog a crate—add more boxes if needed.
If it doesn’t seem like your hens are interested in using the nesting boxes, you can purchase some fake eggs and put one in each nesting box. Chickens are very social and if they see one of their friends doing something, they’re going to want to do it to! That goes for laying eggs. If a hen sees an egg in a nesting box, they don’t want to be outdone, so they’ll jump up there and lay an egg too.
Nesting boxes don’t need to be fancy—just functional. With a few milk crates and a little creativity, you can build a setup that’s cost-effective, practical, and even a little fun to look at. Your hens will be happy, and you’ll have fresh eggs in no time!
0 Comments